Elements of the Graphical User Interface
[Menu items] [Setup form]
Regions: [GCode Streaming] [Digital Read Out] [Custom Buttons] [GCode / Dimension] [2D View] [Control]
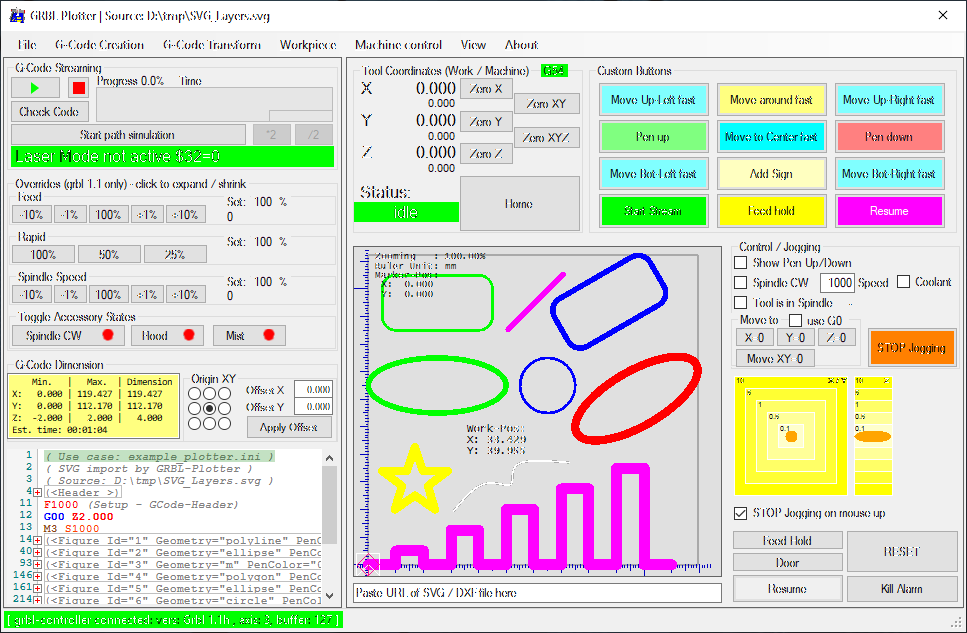
To load any file (SVG, DXF, Gerber, CSV, Image, GCode, INI) just drag and drop the file on the 2D-view, also possible with web links. Also copy & paste of SVG, DXF and GCode is possible.
The menu offers possibilities to generate GCode (text, simple shapes, barcode), to transform GCode (mirror, scale , rotate), to switch display (machine area, pen-up path).
6 languages are currently supported (english, german, arabic, spanish, portuguese, russian, chinese, japanese)
GCode Streaming
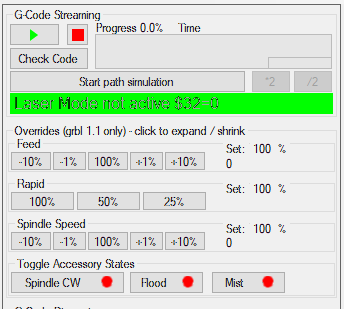 This area shows buttons to start/pause, stop the GCode streaming towards the grbl-controller. With grbl version 1.1 also override options will be shown, which allows the user to change the feedrate or spindle speed during the operation.
Unique is the pause mode, which allows the user to move the tool position. When continuing the streaming, the last coordinates and machine state will be restored.
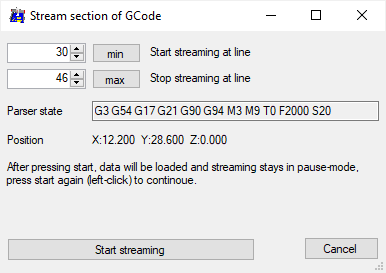
With a right-click on the play button [▶] a specific code section can be streamed, instead of the whole code:
Digital Read Out
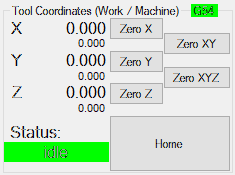 The digital read out shows the actual work and machine position. The work position depends on the selected coordinate system which is currently selected (e.g. G54). Also buttons to set the coordinates to zero (for the selected coordinate system) are available. And 'Homing' can be started (if enabled inside grbl setup) to find end-switches and set coordinat system. The DRO automatically shows up to 6 axis if supported by the used grbl-controller.
Custom Buttons
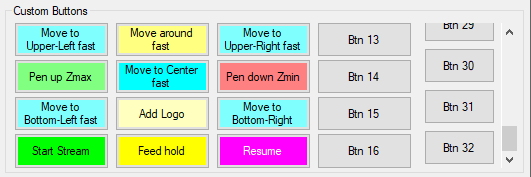
Up to 32 custom buttons can be defined to apply commands or run scripts to perform GCode.
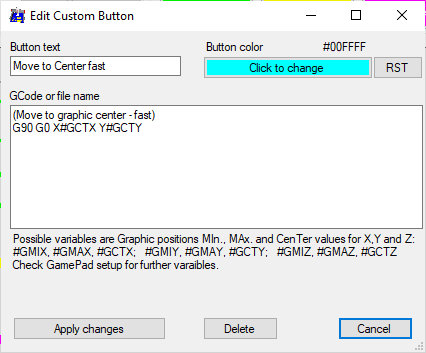
With mouse right-click, the button function and color can be set.
GCode / Dimension
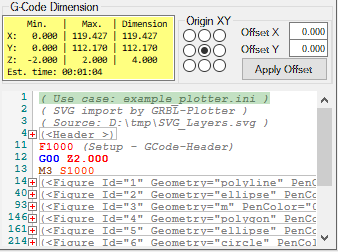 This area shows the imported or loaded GCode with it's dimension and controls to change the offset of the work coordinates.
If the GCode was generated by import of graphics, it will be grouped with XML-Tags for later processing like sorting, moving and deletion.
2D View
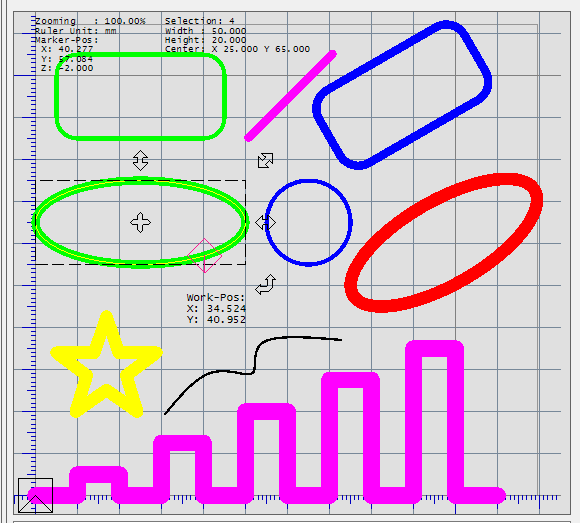 For plotter, laser and simple router applications the 2D-view is good enough. Optional the color and line-width of the imported SVG or DXF graphics can be shown.
Like in vector graphics editor, single objects or groups of objects can be modified in position, size and angle.
Note: it only works on imported graphics, where xml-tags were added to the G-Code.
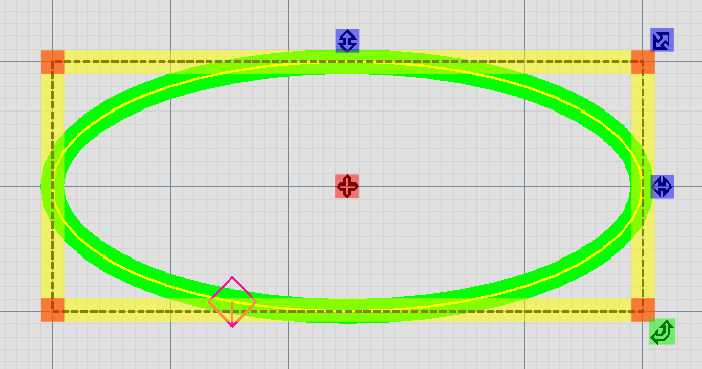
Snap on grid, when moving selected figure and pressing shift-key:
- snap on grid only on x or y axis, when gripped on edge of selection bounds (see scetch below - yellow)
- snap on grid on x and y axis, when gripped on corners of selection bounds (see scetch below - orange)
If text is imported, left-click selects whole text, shift left-click selects single character
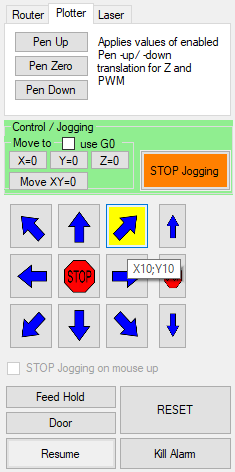
Control
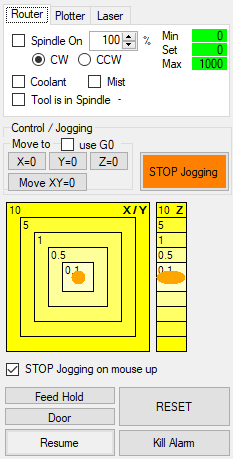
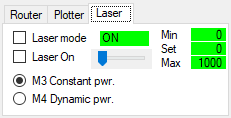
This area offers a live control of your router / plotter / laser engraver: the spindle / laser can be switched on/off, the pen can be lifted or lowered.
With the joystick control, movement commands with specific step-width and feedrate can be sent - check the setup section.
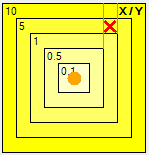
Sensitive area
- Depending where to click on the sensitive area, the distances to move are different for X and Y axis. In this example (clicked on the red cross) the command X1Y5 will be sent.
- If the mouse button is keep pressed, the move command will be repeated with a frequency of 2Hz.
- If the mouse position will be changed during pressed mouse button, the move command (step-widths for and Y) will be adapted accordingly.
- If "STOP jogging on mouse up" is enabled, the motion stops immediately if the mouse button is released (the desired step-width will not be reached).
If "STOP jogging on mouse up" is disabled, the motion will finish the selected distance / step-width.
Classic buttons - soon
- Left-click on the button to send a move-command for the desired direction for the choosen step-width.
- If the mouse button is keep pressed, the move command will be repeated with a frequency of 2Hz.
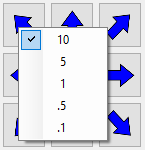
- Right-click on the button to change the step-width for the whole control.
- Click on the 'STOP' button to abort the current jog motion (only grbl version > 1.0)
A Jog motion can be aborted via the big "STOP Jogging" button.
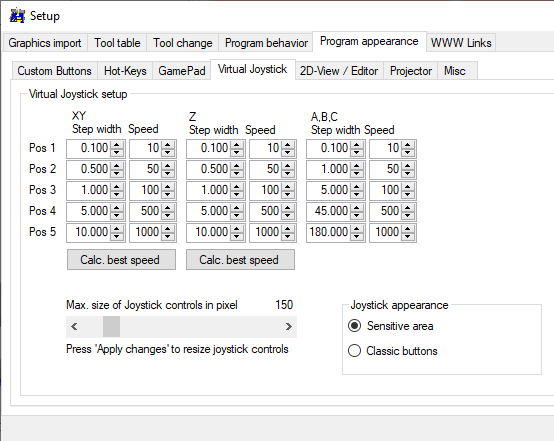
Setup of the joystick control
Set the step-width and correspondig feedrate for each position:
Note: the move-command can be repeated with 2Hz, this means, the move should be finished within 0.5 sec. to avoid summing-up commands within the grbl-controller.
The feedrate should be slightly below
feedrate (mm/min) = step-width(mm)*60 / 0.5(sec)
Set the size of the joystick control.
Select the type of joystick control (not released yet).